My “Go To” Best Kodi Movie Addons 2018
So many choices…so little time!
Ok…you want to watch some films or TV. We understand! Otherwise, why else (besides Live Sports) would you have invested in your Mini Media Center? My list of the best Kodi movie addons 2018, should be all that you need to get started watching the latest in streaming movies and TV. You can also download movies from the Quasar add-on configured to use a USB flash or hard drive plugged into your MMC.
 Exodus: Exodus is BACK! Exodus has been one of the most venerated of Kodi add-ons of all time. It’s ease of use and reliable links made it a favorite of the Kodi community. Exodus, however, has been less and less reliable over time as development was halted. Now, it seems, development has been restarted as a recent update was pushed out to users. It has, though, been “forked” numerous times and one of the most recent is the Placenta add-on discussed below.
 Placenta: Placenta is a new add-on fork of the Covenant add-on. I’ve been using it for a month or so, and can highly recommend it. It offers all that Exodus did, plus some additional features you may find quite useful. In addition, the Placenta developers first made sure all the prior features worked before adding any additional embellishments. You can check out my installation tutorial here. Stay tuned to this site, as I am working on a user guide for Placenta and hope to have it up soon.
Quasar: The Quasar add-on is the number one method for streaming torrent movies and TV shows that brings support and new features to the add-on such as library integration and multi-torrent support.
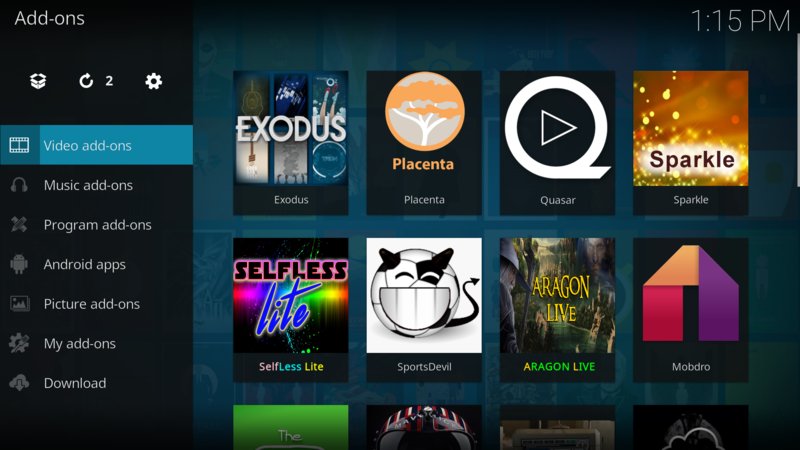
There are a couple of ways to access the above add-ons. One way is to scroll down from the main menu to the Add-ons menu item. You can scroll right and then choose an add-on or you can click on the Add-ons menu item and then scroll through your Video add-ons.

You may have to scroll down to see all of the video add-ons installed
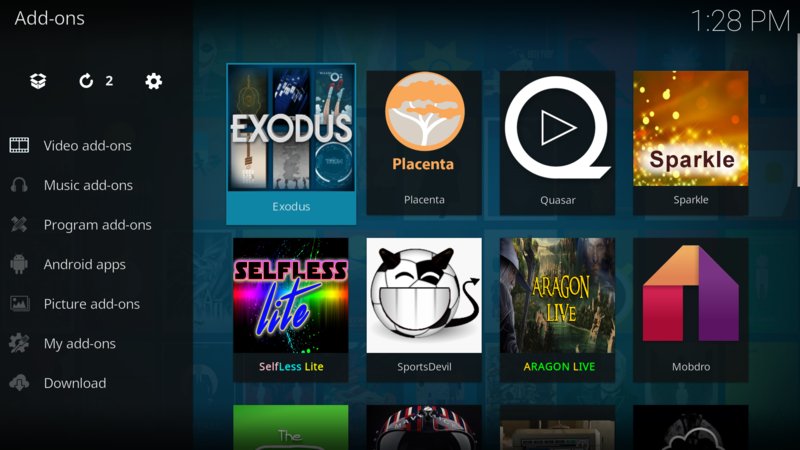
Lets get started with Exodus:
Navigate to the Video add-on menu item and choose Exodus (enter on keyboard – double click on mouse)
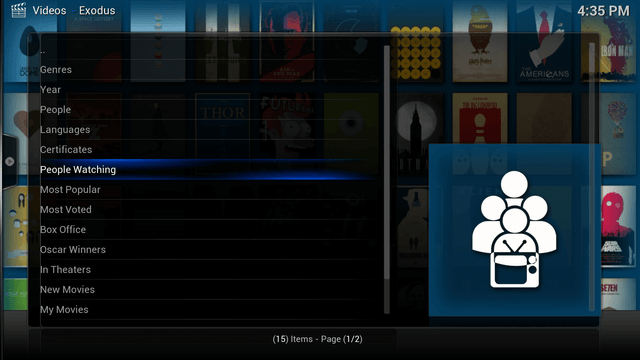
Choose Movies from the Exodus main menu. You will see the choices below. You will notice I have highlighted the People Watching menu item. This is a good place to find new popular movies. Don’t limit yourself to one menu item, however. Have a look around and check out some of the others and you may find you have a favorite or two. In fact, you can add your favorites to the main favorites section for easy access as a later time.
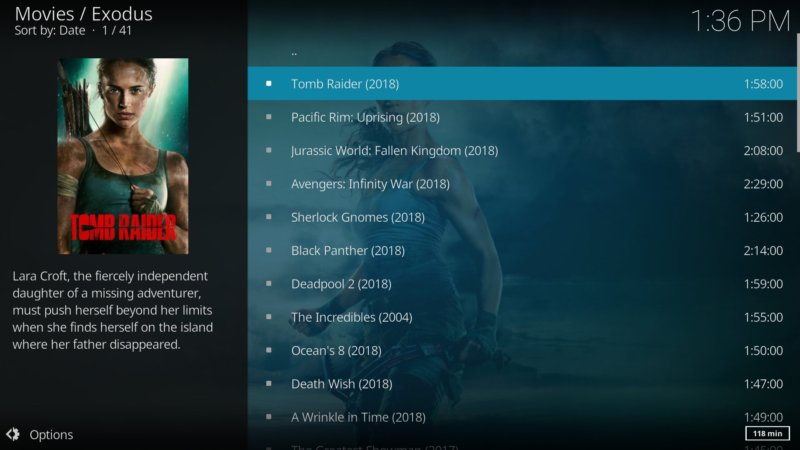
Here is the first screen of those films that others are currently watching thru the addon.You can see more choices by scrolling to the bottom and choosing Next Page.
Once you start a movie you’ll notice it starts automatically if you have enabled this feature in the settings for Exodus. If you find the auto stream is excessively buffering you can stop the stream and choose a stream through the context menu (right click with mouse; c on a keyboard ) using Play using (see below).
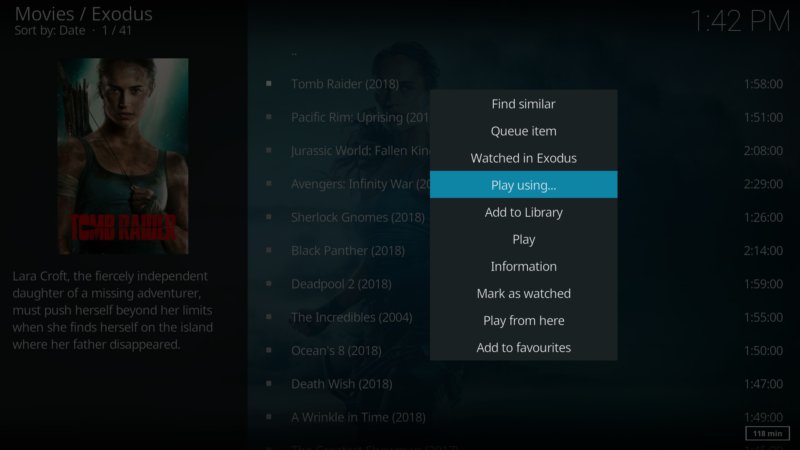
You’ll see a choice of all the sources for that particular movie. In addition, you will see various quality choices e.g., 1080p, 720p and those without a designation which are 480p or standard definition.

Now let’s take a peek at Placenta
Navigate again to the Video add-ons on the main menu home screen and choose Placenta from the featured apps listed to the right (seen below) or from the Video add-ons submenu.

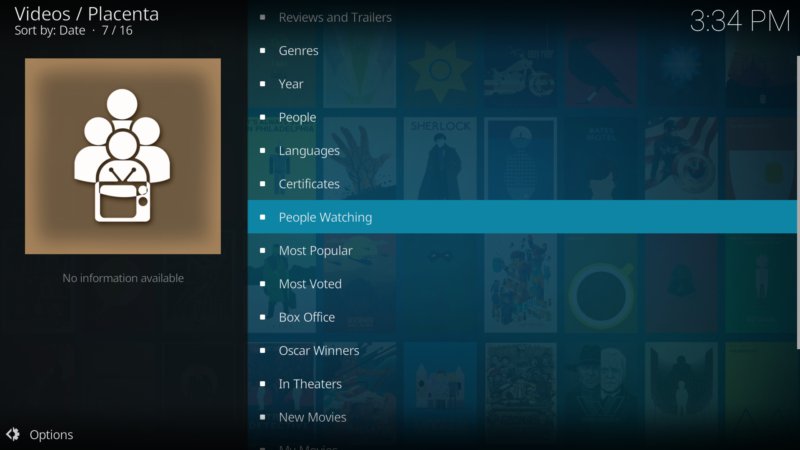
Choose Movies from the Placenta main menu. You will see the choices below. You will notice I have highlighted the People Watching menu item. Like Exodus, this is a good place to find new popular movies. And like Exodus, don’t limit yourself to one menu item. Take some time and check them all out.
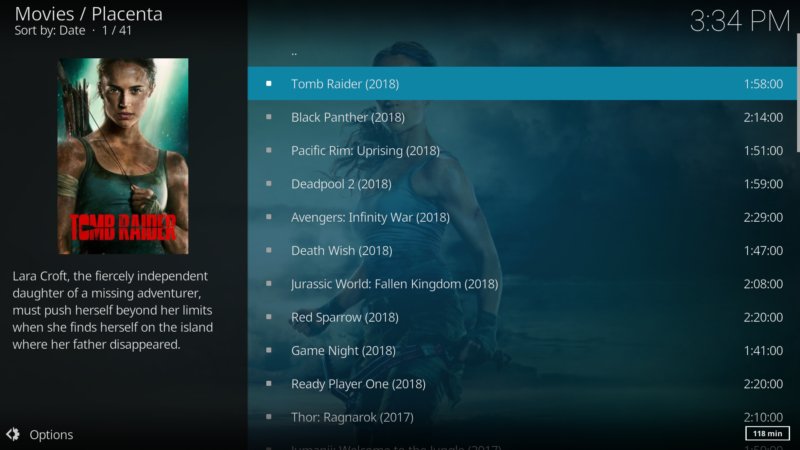
Here is the first screen of those films are trending on Trakt.tv, which Placenta and Exodus use for this – and other – purposes. Again, you can see more choices by scrolling to the bottom and choosing Next Page.
Like Exodus, your movie will start automatically. If, however, you haven’t set this feature in Placenta (or Exodus for that matter), then you can bring up the context menu (c on a keyboard, right click on a mouse) and choose Auto Play as shown below.
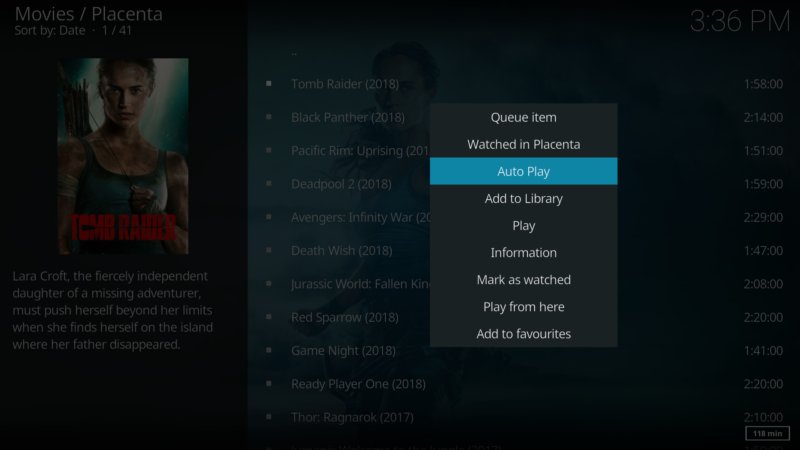
If you haven’t set up auto play, you’ll see a choice of all the sources for that particular movie. In addition, you will see various quality choices e.g., HD1080, High, Medium and Low. HD1080 is kind of self explanatory. High is 720p or greater, Medium is normally 720p and Low is 480p or standard definition.

Now let’s check out Quasar
What differentiates Quasar from the rest of the streaming apps is it streams torrent files from the Internet. Essentially what this means is, instead of one source to choose from, you will get a choice of numerous hosts for the same file resulting in extremely fast downloads with little or no buffering. You can get more information on torrents here.
Navigate again to the Video add-ons on the main menu home screen and choose Quasar from the featured apps listed to the right (seen below) or from the Video add-ons submenu.

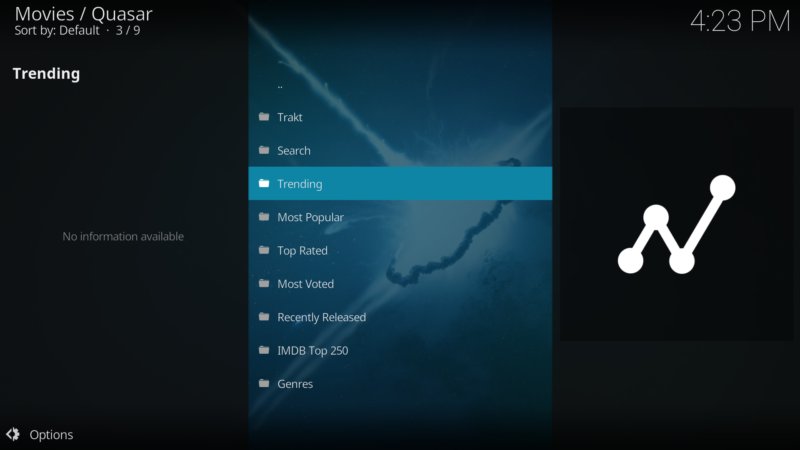
Choose Movies from the Quasar main menu. You will see the choices below. I have highlighted the Trending menu item. This is a good place to find new movies but, again don’t limit yourself to one menu item.
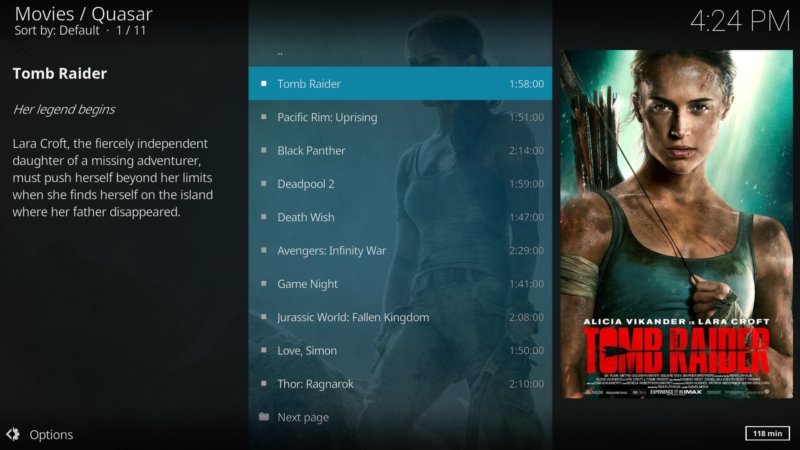
Here is the first screen of those films that are in the category.You can see more choices by scrolling to the bottom and choosing Next Page.
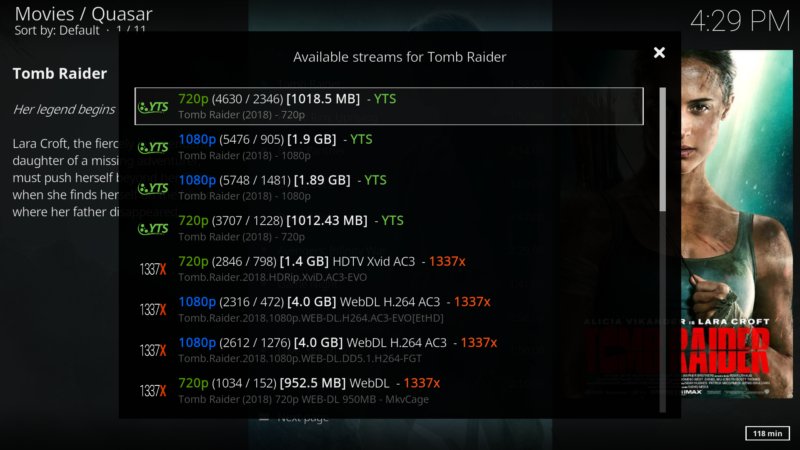
As soon as you choose a movie, Quasar loads a list of providers for this movie as shown below. Once complete, you will be presented with choices to stream the one of your choice. A note on what you will see in the provider list. 1080p and 720p should be self explanatory. However, the rest of the information for each entry has some additional information that will be helpful in making your choice. For example, the first choice above has 4630 seeders and 2346 peers. Essentially, 4630 are sharing the entire file and 2346 are sharing portions of the file (as they have not downloaded the complete file). Choose a provider and your file will start downloading. Once it fills the buffer to 100% (around 3% of the entire file) the movie will start automatically.
I chose a 1080p stream and it started buffering and skipping a little at the beginning. When I have a stream do this then I pause the download (keyboard – space, mouse – left click and pause button) until it gets to around 10%.
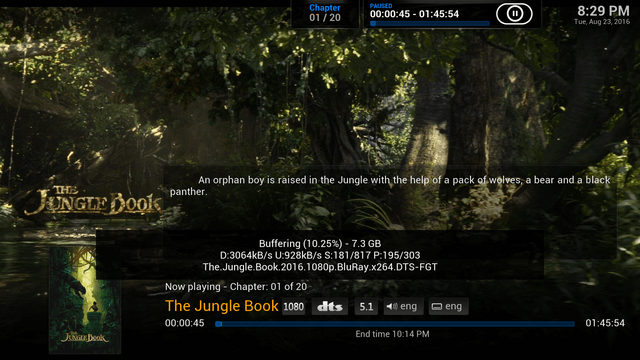
A couple of things of interest in this screen-shot I would like to bring to your attention. This is a big file! As you can see, it is over 7GB. Unless you have purchased a USB or external hard drive and have set up Quasar to save or cache to this drive, then you are better off downloading a 720p file (or less) as they are normally 3GB or less.
OK; that should get you started. But…be sure to check out some of the other video addons. You can find some great sources for movies in 1Channel, Phoenix, The Royal We, UK Turk and VIDTime.
This site and the media it produces is in no way associated with the XMBC Foundation or Kodi and the add-on and/or repository referenced in the article not supported by the Kodi Team or the XBMC foundation. Please do not post questions on the forum.kodi.tv website relating to this add-on. This website shares links to unofficial, third-party repositories and add-ons. We do not create, develop, own, or financially support any of the add-ons linked on this website.
Elementum: The Elementum add-on for Kodi is a fork of the popular Quasar add-on and, like Quasar, uses torrents to stream and download video content like movies and TV shows. These streams are not provided by the Elementum add-on itself, but rather by a selection of providers which scrape information and find links from torrents.